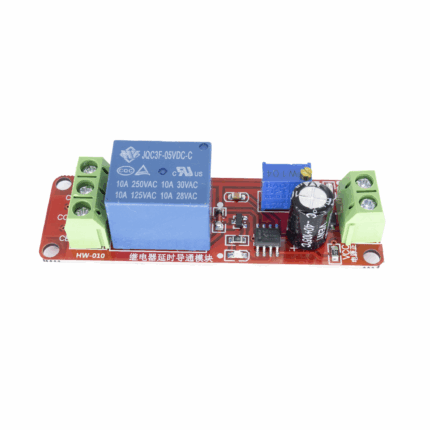
Wiring method
The difference lies in whether your load is connected to AC or DC. Below are two typical application methods.
Dimension
Product Introduction
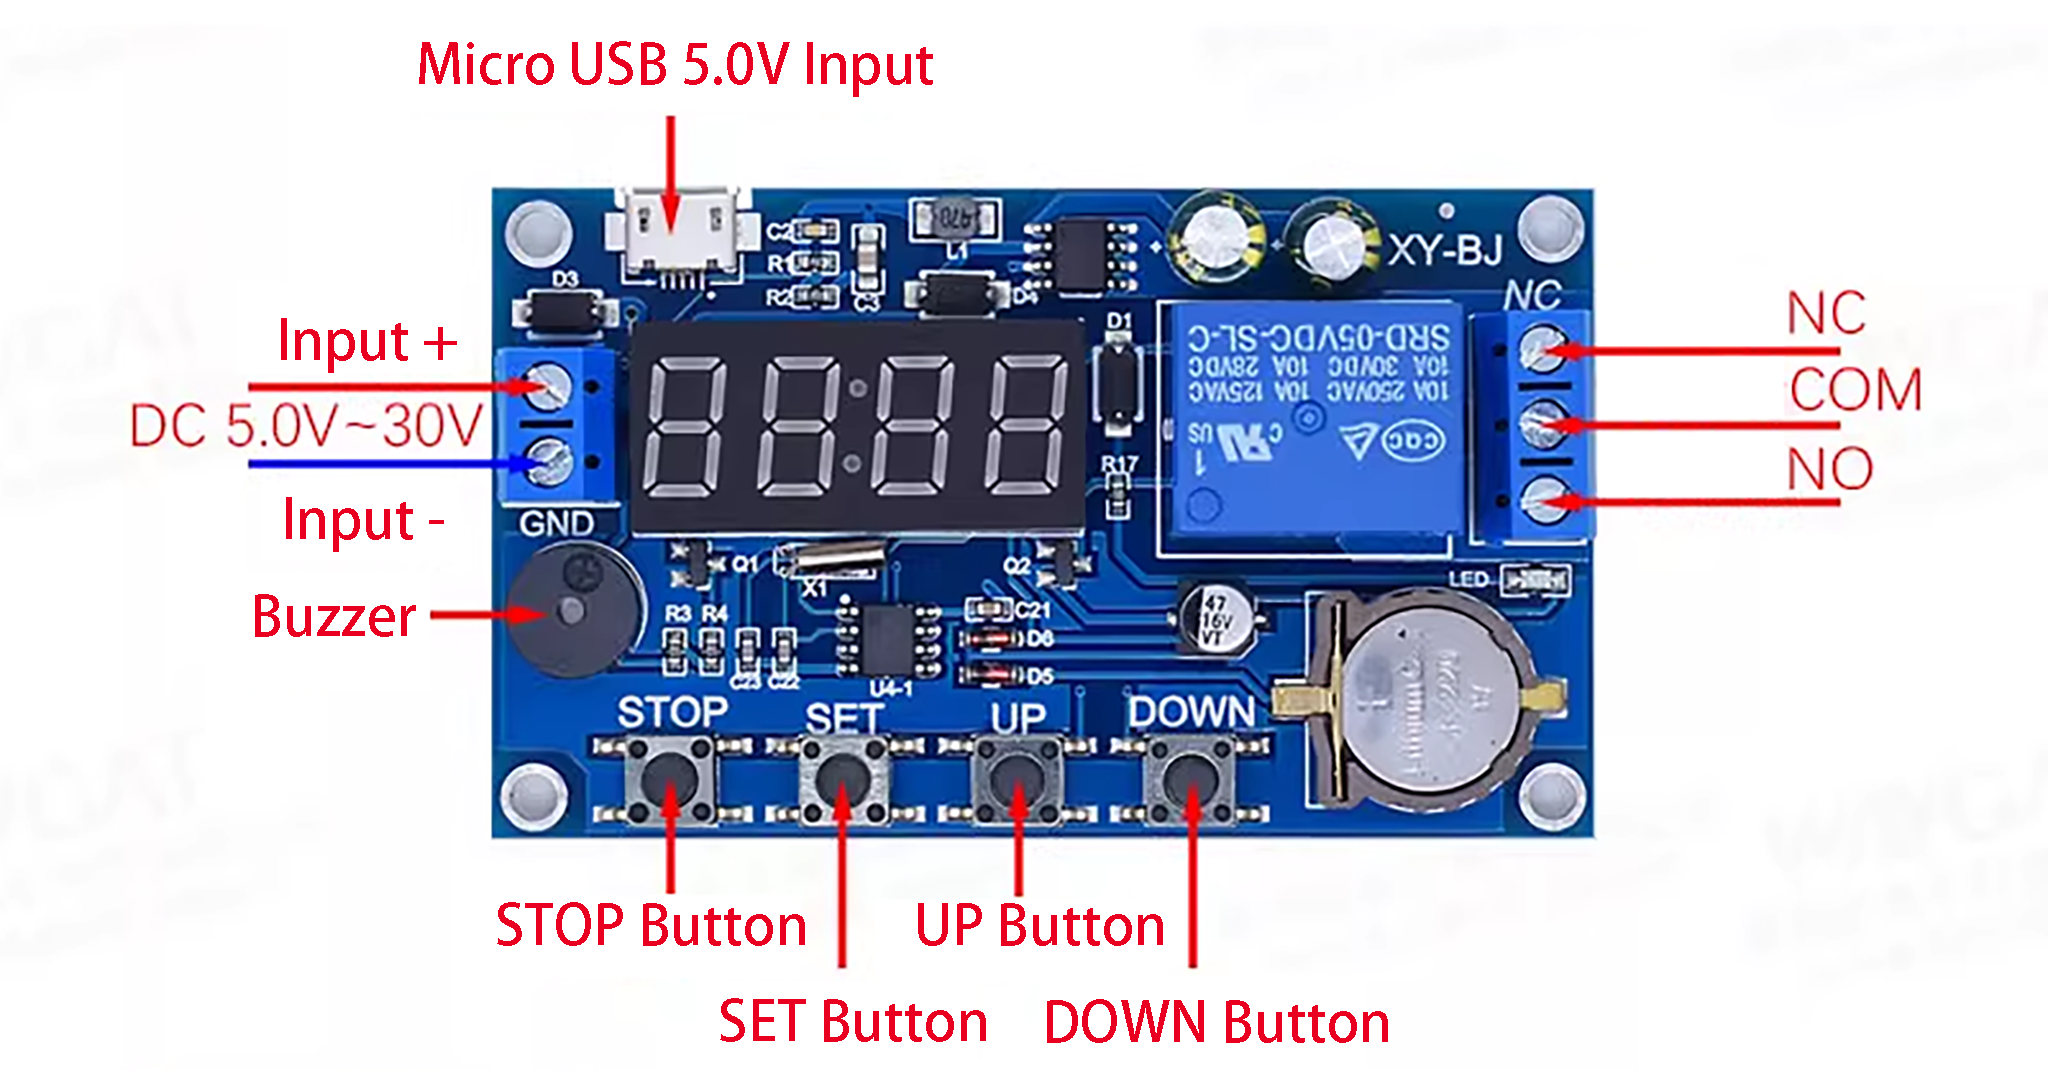
Wide voltage supply: 5.0V-30V; A single pattern can be set for multiple time periods, up to 5. With buzzer alarm function.
- OPE: Relay closing time
- CLE: Relay open time
- Time periods: PE-1 to PE-5, 5 time periods
Function Shielding
P-1: Daily OPE relay activation (output pulse) / CLE relay deactivation (output pulse).
P-2: Same-day OPE relay activation (output pulse) / CLE relay deactivation (output pulse).
P-3: On the specified date (month/day/year): OPE relay activation (output pulse) / CLE relay deactivation (output pulse).
P-4: From [start date] to [end date], daily schedule: OPE relay activation (output pulse) / CLE relay deactivation (output pulse).
P-5: Monthly schedule: [start date] to [end date], daily schedule: OPE relay activation (output pulse) / CLE relay deactivation (output pulse). Note: CLE relay deactivation (output pulse) must precede OPE relay activation (output pulse).
Parameter Setting
In the time operation interface, press and hold the SET key for 2s and release it to enter the parameter setting interface:
1. Select the time period: PE-1 to PE-5, which can be chosen by short-pressing the UP and DOWN keys;
2. Select the mode: “—-” (indicating shielding this time period) or P-1 to P-5 (assigning the time period to the corresponding mode), which can be selected by short-pressing the UP and DOWN keys;
- Note: The repeat mode of each time period can be any one of “—-“, P-1 to P-5;
- Example: All 5 time periods can work in P-1 mode simultaneously, or time period 1 can work in P-1 mode and time period 2 in P-2 mode, etc. It is very convenient and flexible, allowing arbitrary combinations according to personal needs;
3. After selecting the mode, short-press SET to enter the time period setting interface. In this interface, short-press SET to switch parameters: “OPE” (start time), “CLE” (end time), and “dAE” (date information);
4. After completing the parameter setting, exit the setting by pressing and holding the SET key for 2s and releasing it. The system will check if the parameter setting is valid. If valid, the parameters will be saved and return to the time operation interface; if the parameters are invalid (like stop time/date <= start time/date), “ERR” will be displayed as a reminder, and the system will return to the parameter setting interface.
Note: Stop time/date (CLE) and start time/date (OPE) are additional features. You can set any time period individually in the parameter configuration interface (after step 2). Short-press STOP to switch output modes:
OUT1 activates the relay at the start point and deactivates it at the end point;
OUT2 outputs a 1s pulse at the specified time.
In the parameter settings interface (after step 2), long-press STOP to toggle the ring mode: bLL0: Disable ring bLL1: Enable ring.
After the bell rings, press any key to stop the ringing.
Time settings
In the time operation interface, press and hold DOWN:
1.The system will flash “YEA” and then enter the time setting interface. At this time, the last two digits of the “year” will flash, which can be adjusted by pressing DOWN or UP (long press is supported);
2.Short-press STOP, the system will flash “dAE” and then enter the “month/day” setting interface. At this time, the “month” will keep flashing, which can be adjusted by pressing DOWN or UP (long press is supported);
3.Short-press SET, the “day” will flash, which can be adjusted by pressing DOWN or UP (long press is supported);
4.Short-press STOP, the system will flash “HOU” and then enter the “hour/minute” setting interface. At this time, the “hour” will keep flashing, which can be adjusted by pressing DOWN or UP (long press is supported);
5.Short-press SET, the “minute” will flash, which can be adjusted by pressing DOWN or UP (long press is supported). At this time, short-press SET to repeat step 1;
6.Press and hold SET and release it. The time will be modified according to the set parameters, and the system will exit the time setting interface.
Extended Functions
Extended Function of STOP Key
Relay enable mode
ON: The relay is on during the conduction time.
OFF: The relay is off and remains in the closed state.
In the time display interface, short-press the STOP key to switch between ON and OFF. The current status will flash and then return to the main interface. (This function is an emergency stop function to disconnect the closed relay with one key);
After the relay is turned off, the alarm function is activated once the mode is set. Sleep mode:
- C-P Sleep Mode:If there is no operation within 5 minutes, the digital tube will automatically turn off the display, and the program will run normally;
- O-D Normal Mode:The digital tube remains on.
- In the time display interface, press and hold the STOP key for 2sand release it to switch between C-P and O-D modes. The current status will flash and then return to the main interface.
Demo Video
After setting the time on the timer relay, adjust it to a few minutes after the current time. You can see that the light is triggered at the set time. Multiple times can be set, and the specific effect is shown in the video demo.


Reviews
There are no reviews yet.